Search Results:
Search Results:
Search Results:
Search Results:
A TV bracket is a metal frame that fixes a television to a wall, ceiling, or other structural surface. The bracket carries the full weight of the screen and transfers that load into the building structure through a set of fixings rated for the wall type.
Most modern televisions have four threaded mounting holes on the back, arranged in a square or rectangular pattern. This pattern follows the VESA (Video Electronics Standards Association) standard, with sizes such as 200x200, 400x400, and 600x400 measured in millimetres. The bracket bolts directly onto these holes, then attaches to a wall plate fixed to the structural surface.
Wall mounting clears the floor area below the screen, reduces the risk of tip-over in homes with children or pets, and lets you set the viewing height precisely. It also allows the screen to sit flush with surrounding cabinetry for a built-in look. A stand limits placement to flat surfaces and adds visual bulk under the screen.
Electrical wholesalers stock brackets alongside the cabling, fixings, and tools needed to complete an installation in a single order. AV retailers tend to focus on the screen and sound system, with brackets sold as an add-on. For trade buyers and renovators, sourcing from a wholesaler keeps the parts list and the supplier list short.
A reliable supplier carries brands you recognise, lists clear weight and VESA specifications on each product page, and ships from Australian stock. Stocked inventory means parts arrive when promised, which matters when a trade job is booked for a specific day.
Sparky Direct ships nationwide from Australian warehouses and supplies licensed electricians, AV installers, and DIY renovators. Trade pricing is available for account holders, and bulk orders for fitouts can be quoted directly through the contact page.
Each style trades flexibility against profile and price. Fixed mounts are the cheapest and lowest profile but allow no adjustment. Full-motion mounts cost more, sit further from the wall when retracted, and place greater stress on the fixings, but they give the most flexibility in viewing position.
| Bracket Type | Best For | Wall Profile | Adjustment |
|---|---|---|---|
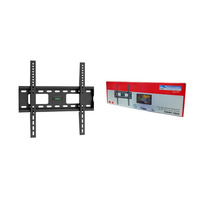
| Fixed | Single fixed seating position at eye level | Slim (under 25mm) | None after install |
| Tilting | Screens above eye level, glare reduction | 40 to 70mm | Vertical tilt only |
| Full-Motion | Open-plan, corners, multi-seat rooms | 50 to 100mm retracted | Tilt, swivel, extend |
| Ceiling | Retail, gyms, commercial overhead displays | Drops from ceiling | Tilt and swivel options |
A fixed bracket places the load directly against the wall through a wide fixing footprint. A full-motion bracket holds the screen on jointed arms, which multiplies the load on the wall fixings as the arms extend. Heavier screens on full-motion brackets require more fixings, deeper anchors, and a wall structure rated to take the leverage.
Fixed mounts are the simplest to install: lift, level, and bolt down. Tilt brackets add a pivot but install in a similar way. Full-motion brackets need careful positioning so the arms have clearance to extend without hitting cabinetry, doorframes, or window reveals.
If everyone watches from one couch, a fixed mount works. If the screen is high on the wall in a bedroom or kitchen, a tilt mount lets you angle it down. If the room has multiple seating areas or the screen needs to be pulled out for cleaning behind, a full-motion mount earns its higher cost.
Brackets are rated for a range of screen sizes, measured diagonally in inches. A typical bracket might suit 32" to 55" or 55" to 85" screens. The rating is a guide based on the VESA pattern and weight envelope of typical TVs in that size range.
Each bracket lists a maximum load in kilograms. The figure should always exceed the actual screen weight by a comfortable margin. A 30kg TV on a 35kg-rated bracket leaves almost no headroom for the dynamic loads created by knocks, adjustment, or cable strain. A 30kg TV on a 60kg-rated bracket sits well within safe working load.
Choosing a bracket rated well above the screen weight reduces flex, vibration, and long-term sag. Heavier-rated brackets use thicker steel, larger fixings, and stiffer arms. The cost difference is usually small relative to the cost of the screen.
Large-format screens need brackets with wider VESA ranges (often up to 600x400 or 800x400) and load ratings above 50kg. Two-person installation is recommended for any screen above 55" or above 25kg, since handling a large panel onto a wall plate single-handed risks both the screen and the installer.
Pick a bracket with a weight rating at least 1.5 times the actual screen weight. This builds in margin for movement, knocks, and the leverage created by full-motion arms.
VESA is the international standard for the mounting hole pattern on the back of a flat-panel TV or monitor. The pattern is described by two numbers in millimetres: width by height. A 400x400 VESA pattern means the four mounting holes form a 400mm square.
Measure the horizontal distance between the two left holes and the two right holes (centre to centre). Then measure the vertical distance between the two top holes and the two bottom holes. Common patterns include 100x100, 200x200, 300x300, 400x300, 400x400, 600x400, and 800x400.
The bracket must support the exact VESA pattern listed in the TV manual. Many brackets cover a range (for example, 200x200 up to 600x400), with sliding rails or multiple bolt positions on the wall plate. Always confirm the bolt thread size as well: M6, M8, and M10 are the common sizes, and the wrong thread will not engage the screen properly.
Curved screens fit standard VESA brackets, but the curve can leave a wedge-shaped gap behind the panel. This is normal and does not affect the mounting integrity. For very large screens above 75", check that the bracket's wall plate is wide enough to span two studs in a timber-framed wall, since single-stud fixing is rarely sufficient at that size.
Most internal walls in Australian homes are plasterboard over timber or steel studs. The bracket must fix into the studs themselves, not the plasterboard. A stud finder or magnetic detector locates the studs, which usually sit at 450mm or 600mm centres. Where studs do not align with the bracket plate, heavy-duty cavity anchors rated for the load can be used in plasterboard, but stud fixing remains the preferred method for any TV above 20kg.
Solid masonry takes the load directly. Drill with a masonry drill bit matched to the supplied wall anchors, blow the dust out of each hole, and seat the anchors fully before tightening the bracket. Hammer drill or rotary hammer is recommended for concrete.
Solid timber walls take coach screws or lag bolts directly. Brick veneer with a cavity needs purpose-made cavity anchors. Concrete sheet (compressed cement sheet) needs through-bolting where possible. Render over masonry should be drilled through to the masonry below, not anchored into the render layer.
Bracket kits usually include generic fixings, but the included pack may not suit every wall type. Trade installers stock a separate range of wall plugs and anchor screws to match the surface. The wrong fixing in the wrong wall is the single most common cause of bracket failure.
Plasterboard warning: Plasterboard alone cannot safely hold a wall-mounted TV. Always fix into the underlying stud, or use rated cavity anchors specifically designed for TV bracket loads. Standard hollow-wall anchors are not sufficient.
The screen centre should sit roughly at seated eye level, which is around 1.0 to 1.2 metres from the floor for most lounge layouts. A fixed or tilting bracket suits a single-couch arrangement. Open-plan living areas with multiple viewing angles benefit from a full-motion bracket.
Bedroom screens often sit higher on the wall, opposite the bed. A tilt bracket angles the screen down toward the pillow line. Mount the bracket above any built-in bedheads, and check that bedside lamps will not glare across the screen.
Meeting rooms, reception areas, and digital signage installations typically use fixed mounts for security and a clean look. Where the screen needs to swing out for connection access, a full-motion mount with a lockable arm position works well.
Position the screen to avoid direct sunlight from windows during peak viewing hours. If the wall faces a window, a tilt mount lets you angle the screen slightly downward to throw reflections off the seating area. Screen height that is too high causes neck strain over long viewing sessions.
Use a stud finder to mark every stud across the bracket footprint before drilling. Mark the centre of each stud, not the edge. For masonry, check there are no embedded conduits or pipes by scanning with a multi-detector first.
A typical install needs a drill bit matched to the wall plug or anchor, a spirit level, a stud finder, a screwdriver set, and a socket or driver to torque the bracket bolts. A second set of hands makes lifting any TV above 25 inches considerably safer.
The most common mistakes are drilling into plasterboard alone, using the wrong wall plug for the surface, over-torquing bolts (which can crush plasterboard or strip threads), and skipping the spirit level. A bracket that is even one degree off level will show clearly on the screen edges.
DIY installation is fine for most homeowners on stud walls or solid masonry with simple fixed or tilt brackets. A licensed installer is the better choice for screens above 75", ceiling mounts, brick veneer with hidden cavities, multi-screen video walls, or any installation involving recessed power and data outlets behind the screen.
Quality brackets use cold-rolled steel with a powder-coated finish. Steel thickness is the clearest indicator of strength: heavier-gauge brackets feel solid, do not flex when handled, and show no visible deformation under load.
On tilt and full-motion brackets, the joints should move smoothly with consistent resistance. Sticky or loose joints indicate poor manufacturing tolerances. A well-built bracket holds its position without drifting under the screen weight.
Better brackets include cable channels along the arms, clip-on covers, and cutouts in the wall plate for routing power and signal cables behind the screen. These features keep the finished install looking neat and protect the cables from strain.
A bracket should outlast multiple screens. Look for warranty length as a proxy for manufacturer confidence. Replaceable hardware (bolts, washers, spacer kits) is a sign of a product designed for serviceability rather than disposable use.
The simplest method is to feed power and HDMI cables down through the wall cavity, exiting at a recessed outlet behind the bracket. Cable entry plates finish the openings cleanly and stop draughts moving through the wall.
Where running cables inside a wall is not practical, surface trunking provides a tidy alternative. Plastic trunking can be painted to match the wall colour and clipped over the top of the cables for a near-invisible finish. Cable management accessories make this work go faster.
Leave a service loop of cable at the screen end so the connectors are not under tension. HDMI ports in particular are vulnerable to damage from constant downward pull. A short loop also lets the screen be tilted or extended without stretching the cables.
Even on a fixed install, plan how cables can be replaced later. HDMI cables wear out, signal standards evolve, and new devices need new connections. A pull cord left in the wall cavity makes future cable runs simple.
Most fixed and tilt brackets allow small left-right adjustment after the screen is hung. Loosen the side bolts on the bracket arms, level the screen with a spirit level placed along the top edge, then re-tighten. If the wall plate itself is out of level, the bracket has to be removed and reinstalled.
A wobbly screen usually means a wall plug has failed or a fixing has not seated properly. Take the screen off, remove the bracket, inspect each hole, and refit with a heavier-gauge anchor where needed. Do not retighten bolts in failed plasterboard, since this only enlarges the hole.
Full-motion arms can stiffen with dust over time, or sag if the gas struts inside fail. Most reputable bracket brands offer replacement parts for arms and friction joints. A heavily sagging arm may signal that the bracket is undersized for the screen weight.
Intermittent picture or sound is often caused by a partly-disconnected HDMI cable behind the screen. Check the cable seating before assuming a fault with the TV or source device. Recessed wall outlets reduce strain by giving the cables somewhere to sit without bending.
Budget brackets cover the basic job of holding a screen against a wall. Premium brackets add features: smoother adjustment, better cable management, lockable positions, and higher safety margins. The price difference is small relative to the cost of the screen they are protecting.
A failed bracket can drop a screen worth thousands. The damage is rarely limited to the TV: walls, floors, and furniture below the bracket all take the impact. The saving on a cheap bracket evaporates with a single failure.
Multi-screen projects (offices, hospitality fitouts, multi-unit residential) benefit from sourcing brackets in bulk through a single supplier. Standardising the bracket model across an installation simplifies spare parts, training, and aesthetic consistency.
A quality bracket should outlast at least two generations of TV. Choosing a model with broad VESA range and high weight rating means the bracket can accept the next screen without being replaced.
Lounge rooms, bedrooms, kitchens, alfresco areas, and home gyms all use TV brackets for different purposes. Outdoor and alfresco installations need brackets with corrosion-resistant finishes and weatherproof fixings.
Boardrooms, breakout areas, and reception zones use fixed mounts for security and a clean visual line. Cable management and recessed outlets are standard in commercial work.
Pubs, clubs, gyms, and retail stores often combine ceiling mounts (for overhead displays) with full-motion wall mounts (for adjustable viewing). Loadings can be high on these brackets, since screens are larger and arms extend further.
Video walls, sports bars, and command-and-control rooms use specialist multi-screen brackets with micro-adjustment to align screen edges. These installations are best handled by experienced AV installers.
The wall structure must carry both the static weight of the screen and the dynamic loads from accidental knocks. Stud-mounted brackets transfer load into the building frame; cavity-anchored brackets rely on the plasterboard's pull-out resistance, which is much lower.
Recessed power outlets behind a wall-mounted screen must be installed by a licensed electrician under the requirements of AS/NZS 3000:2018. The bracket itself is not an electrical product, but any concealed wiring or new socket added behind the screen falls under the electrical wiring rules.
Bracket products sold in Australia should meet relevant safety standards for load rating. Recessed AV outlets and cabling work behind the screen are covered by AS/NZS 3000:2018 (Wiring Rules) and AS/NZS 3084 for telecommunications cabling.
Two people are needed for screens above 55" or 25kg. Lift the screen by the frame edges, never by the panel face. Set the screen face-down on a soft, flat surface when bolting the bracket arms, then lift directly onto the wall plate.
Watch Matchmaster 04MM-TB05 | TV Flush Mount Bracket 32-55" Full Wall Plate video
Watch Gripit AUGTVKIT | TV Bracket Fixing Kit | Holds up to 60KG video
Watch Matchmaster 05MM-WP66 | 60mm Wall Entry Point For Audio and Video Cable Management video

Received my Matchmaster 01MM-SA100 Log Periodic Digital TV Antenna VHF/UHF 9 Element antenna as advertised. Installed this unit myself in about 40 minutes replacing old with new, f type fittings supplied made the process easy as I already have the cable cutting tool and crimper to complete the installation.
product exactly as described, all parts where included even the silent blocks, quality and price are outstanding, spirit level is already mounted on the rail, easy to install, for a few bucks you'll get it even faster, if you don't want to install the horizontal rail you can install the vertical only...great product
I've trialed many different brand wall brackets over many years. They are either great but expensive or fiddly and not level but cheap. These Freddox brand brackets are super easy to construct, sit perfectly level, look great and are inexpensive. After testing 2 I immediately purchased another 20 for stock.
Quality products in stock • Fast Australia-wide delivery • Competitive trade pricing
Browse TV Brackets → Get Expert Advice →Yes, most brackets are designed for simple adjustment and secure positioning.
Sparky Direct supplies TV brackets Australia-wide, offering reliable mounting solutions with convenient delivery.
TV brackets are securely packaged and delivered via standard courier services.
Unused TV brackets are generally eligible for return according to the seller’s returns policy.
Warranty coverage varies by manufacturer and typically covers defects in materials or workmanship.
Yes, TV brackets are available in a range of sizes to suit different TV dimensions.
Yes, installation should be carried out by a qualified installer or licensed tradesperson where required.
Many brackets can be reused if they remain undamaged and compatible with the TV.
Quality brackets are designed to securely support the TV’s weight.
Yes, they are commonly used in bedrooms and living areas.
Correct installation helps minimise wall damage, while incorrect fixing may cause issues.
When installed correctly, TV brackets provide secure mounting and reduce tipping risks.
Adjustable brackets help reduce glare and improve viewing angles.
TV brackets are used to securely mount televisions to walls, ceilings, or other structures.
Wall-mounted TVs free up floor space and create a clean, modern look.
Choosing the right bracket depends on TV size, viewing position, and desired adjustability.
Many brackets include mounting hardware, but wall-specific fixings may vary.
Yes, they are commonly used in homes, offices, retail spaces, and hospitality settings.
Some brackets allow tilt, swivel, or extension to improve viewing angles.
TV brackets can be mounted on suitable wall structures, depending on fixing method and wall construction.
Yes, brackets are available for a wide range of TV sizes and weights.
VESA refers to the standard spacing between mounting holes on the back of a TV.
Compatibility depends on the TV’s size, weight, and VESA mounting pattern.
Many TV brackets are designed to meet relevant AS/NZS safety and load requirements when installed correctly.
Common types include fixed brackets, tilting brackets, full-motion brackets, and ceiling-mounted brackets.